Showing posts with label rustic dinnerware. Show all posts

Wednesday, November 13, 2013

Thanksgivukah! Thanksgiving + Hanukkah

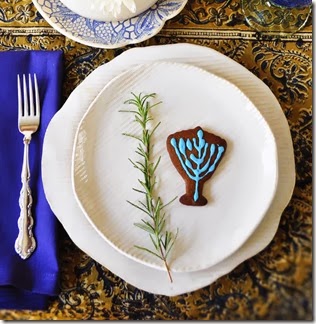
Thanksgiving and the first night of Hanukkah coincide for the first time in 125 years! Latkes and cranberry ginger relish, hey, what’s not to love about that? The food is easy since our Thanksgiving dinner is served early afternoon so we can waddle off for a hike afterwards. Hanukkah will be my homemade latkes, rustic applesauce, and an extra dollop of leftover cranberry relish on top, with the sour cream optional. I’ve always served gingerbread Hanukkah cookies for dessert. So the only problem left is how to set the table to morph easily from the riot of fall colors to the cool blue of Hanukkah. My solution is to go with showy white flowers, vases and candles, accent the rustic side of Thanksgiving décor, add gray as a transitional tone, and use blue for color pop. My husband made the new rustic menorah, which we will light fully for the afternoon meal, and reset for Hanukkah in the evening. Here are some style shots you can use to help style your own Thanksgivukah.

Hanukah table on Thanksgiving 2 lilies in cone vase

lilies

rustic menorah rustic hanukkah 2

flower frog vase with star cookie table set for Hanukah Thanksgiving


Hanukkah place setting River Journey dinnerware with a rustic Hanukah setting

Harvest arrangement

May we be forever grateful for the miracles of light that bless our lives with hope and abundance. Have fun setting your table! The pottery here is available at Lee Wolfe Pottery.

Sunday, January 22, 2012

Lace Textured Ceramics

DSC_1010
One of the first things children love to do with clay is to press objects with texture into it. The yielding clay surface magically conforms to the pressed object, making a negative imprint. I’ve never lost this fascination, and have returned to it in the past few weeks.
DSC_1012
To do this, I roll the clay into a thin slab. Hand rolling in multiple directions makes the final piece much stronger and more durable than using a slab roller. The particles of clay are packed more densely. I select a fabric from my growing stash and use a rolling pin to press the pattern into the clay. Sometimes I press the entire surface and sometimes just a select amount.
DSC_1013
A round template is used and the clay is cut with a needle tool. This round slab is then left to dry to leather hard. It should stand upright but have some flexibility. Trial and error will show you when the clay is ready to be formed.
DSC_1015
I curl the edges up by hand, rotating the bowl. I like rustic shapes so I don’t force perfect conformity. There is a refined organic flow that can happen if you take your time and allow a unique shape to emerge.
DSC_1017
I use a potter’s rib to check the inside diameter, although this is more of a guide than a template. Do you see the rounded rim? That is important for strength and function. I have smoothed and slightly thickened the rim. A thick rim protects the bowl from shattering if it gets bumped. A thin rim will transfer the shock of impact to the center of the plate, causing a crack.
DSC_1019
When the bowl is stiff but not yet bone dry, I center it on a hump mold on my wheel. A thin foot rim is thrown, and the piece is signed. The foot rim allows the piece to sit with stability.
I’m waiting on a kiln load to cool now that has some of my first tests with lace textured ceramics, so you can check OneClayBead to see if any are listed yet.
This will be my 2012 line of dinnerware. I love making it, and can’t wait to see where this journey takes me.